Wednesday, April 30, 2014

Legacy Glass on the Samsung NX300

Fortuna - Lady Luck, decided to bless me with a digital camera by means of a Dutch brewery presenting me a Samsung NX300.
Well, I like Samsung, my stone-age TV was made by them, and the 5" tablet (WiFi only), which usually accompanies me on trips, substituting a notebook computer. But, the cameras? Really?
In a local electronics store, I fiddled a bit with Samsung's P&S-cameras, however, I was not impressed, to say the least.
And now, I won their top-end CSC (compact system camera), the NX300 (top-end to the time at least, now there is the NX30, I know).

First impressions showed an all in all OK camera, but not more than that. Images of decent quality, however, there is a problem when shooting in RAW, which of course is my format. On the very left side, there is a stripe exposed about +1 Ev brighter than the rest of the image. When saving both, a RAW and a JPEG, in 80% of the cases the JPEG is cropped such, as to make the stripe disappear. Not sure what that means! Is it just my camera, or does Samsung actually know about the "feature" and hence crop it out of the JPEG?! I consider sending a mail to Samsung in order to get an opinion on what's going on here.

Well, this post is now about the flaws of the camera, it is about its strength!

Even before the camera was delivered to me, I purchased an M42-NX adapter on the interweb, since I own a fair amount of good quality M42 legacy glass.
The looks of the adapter were promising... However, sometimes, looks are deceiving. With the adapter installed, the camera told me that no lens was present. Hmmm, that was not according to the plan!
The wisdom of the interwebs suggested that using cheap mount from the far east may result in this error message. Well, I thought, let's invest 3x the money and buy an adapter made in the first world... same result! Money down the drain, mainly because I did not research the problem properly but trusted some auction-site's sellers promises.

It turns out that there is a switch in the camera, which a correctly mounted lens depresses, indicating the presence of a lens. Have a look:

NX300 lens port
Marked in red, this is the switch, which has to be depressed in order to indicate the presence of a lens.
The green mark indicates the lens locking pin.

For whatever reason, the adapter are not sufficiently thick to actually depress the switch far enough. Some guy on the interwebs deformed this adapter... I choose to stick some tape on it.


Aftermarket M42-NX adapter
Note the black tape used to thicken the bayonet. The red mark indicated the location of the switch sensing the presence of a lens.
Here, the green mark, just for orientation, highlights the recess for the locking pin.

With the tape added, the adapter was recognized as a lens. Perfect!

Now to the main attraction of the NX300, focus peaking! And yes, you guessed it, at first it did not seem to work. The camera was taking pics w/o any problem now, but there was no focus peaking or focus zoom by the usual suspects, e.g. shutter release half-press.
However, the wisdom of the ever mighty interwebs revealed that pushing the camera's "OK" button, starts whatever manual focus aid was selected in the config-menu.

There we go... Finally the entire camera makes sense to me!

For street photography, lenses can be manuallyt pre-focused on a 3m distance, which will provide a usable depth of focus of about 2.5m to 4.5m @ F8.

For portraits, the camera's focus peaking allows for very wide open lenses, such a the TOKINON 55mm F1.4, which is very hard to use on a dSLR.

Finally, to the beauty of it all. My NX300 came in black and silver, very classy, very stylish. Actually, some guy asked me about details of this camera, just because of its looks.
I happen to own some legacy glass in just that color scheme, e.g. ISCO - Westanar or CARL ZEISS - Tessar. Adding such lenses to the black NX300 makes for some real nice retro style gear, which is actually performing real good.

Samsung NX300 with ISCO WESTANAR 135mm


Monday, April 28, 2014

Selective Focus Photography

The majority of my latest posts were quite techy. Now, to something completely different!
Let's get artsy!

You have seeing me experimenting with pinholes, creating not only creamy focus with infinite depth of field, but also weird colors.

Today, I would like to show the opposite, going selective with very shallow depth of field. The name of the game "selective focus", the mother of it all, the Lensbaby system (mama!).

Actually, when you open the box, the first you see is a manual leaflet with the friendly imprint "mama!" on it. Nearly as comforting as the words "don't panic" printed in friendly letters of a very important guide book.

Back to Lensbabies! The basic idea behind this system is to give artistic freedom to photographers beyond the commonly used better than the rest lenses everyone uses.
Usually, objective lenses aim for creating a perfectly flat focus plane. Not so the basic lenses of the lensbaby system, which create more like a focus-sphere, resulting in what lensbaby calls a "sweet-spot".
Let's stay at idea of the sweet-spot for the moment (other stuff to follow). Said sweet-spot can be moved across the image plane of your (d)SLR or mirror-less camera. Depending on what aperture is used, various depths of field can be selected... of course you want to go really shallow, right?!
Selecting the aperture is somewhat manual, at least in the system that I got. Changing aperture means literally changing disks with an aperture. The benefit of this is that at all stops have a perfectly round shape, for beautiful bokeh-balls!

Interesting about the system Lensbaby is the availability of different optical units to be placed in a lens body allowing for tilt in all directions. There are mechanical and manual options to perform such tilting action. Things of course come with 2 sides, as medals... Mechanical tilt operation, which is slow, allows for mechanical focusing, which is precise. Manual tilt operation, really fast and hence good for street photography, comes with manual focusing, i.e. using fingers of both hands to achieve focus at the desired tilt.

Presently I own 2 different lens-bodies, the "Spark" for my trusty Digital Rebel Xt and the "Composer with Tilt Transformer" for the micro-4/3 system (Olympus PEN E-PM2). The Spark is a pure manual system, while the Composer is a fully mechanical system.

The optics of lensbaby are said to have a focal distance of 50mm. On a full-frame (d)SLR, that would be a normal objective.
The 350D (Rebel Xt) carries an APSC sensor, resulting the lens to be 80mm equivalent, i.e. a short telephoto lens.
The micro-4/3 system has a crop-factor of 2, 50mm is therefore equivalent to a telephoto lens of 100mm.

Right... techy again... let's get artsy and look at some pictures!


Lensbaby Spark @ Canon EOS-350D

Hoofvijfer, Den Haag

Tuning violin player (Gevangenenpoort, Den Haag)
As said before, the Spark is a lens with is focused and pointed with the might of fingers. These are first experiments. It is clear that this type of photography requires a lot of practicing.
The fountain and island of the Hoofvijfer are pretty much in the sweet spot. Although I like the photo of the violinist, the sweet spot is behind him at the wall. As a lame excuse I claim that I was walking, trying to not bump into tourists, while trying to get the sweet-spot on the guy...


Lensbaby Composer w/ Tilt Transformer @ Olympus E-PM2

This combo, although being much more precise, is a lot slower. I missed (blew!) quite some shots due to the mechanics.
First of all, there are 2 very different activities going on. The lens body, which is held by a ball hinge, has to be tilt into the desired direction. Then, the focus ring of the body is used to bring the optics into the desired focus.
It seems the Composer is more for studio work... maybe architecture... something that does not move, or at least not too quickly.

Here's a lesson to learn have a look:
Composer w/ double glass @ f2.8
This guy, sitting about 1m apart from me on the same bench, was very very patient with me! I took 3 shots, this is the last of the series. Yep, the sweet-spot is on his claw, not on his eye... I tried to correct, which created some weird noise... and he was gone! Note: for close-up wildlife, better use manual action Lensbabies, such as the Spark or the Muse!
Don't know why the bokeh is so crappy....

One learns from mistakes. (Mind you, this was the very first day I was in possession of the composer.) Hence, I adopted my workflow to first determine where in the frame the sweet-spot is, contrary what lensbaby.com tells in their manual.

This is what I do:
  • point the camera right to the ground, as parallel as possible
  • find the focus of the sweet-spot
  • now: slightly de-focus towards infinity, the creates a sharp ring around the sweet-spot (*)
  • move the ring to circle around some feature in the live-view, e.g. a crossing of golden ratio lines
  • lock the ball-joint
  • move your "subject" (I hate that word) into the region of the sweet-spot
  • focus
  • shoot!
There are a lot of helper lines available in modern cameras, e.g. rule of thirds or golden ratio, which btw. are not the same!
Now that you now where the sweet-spot is located, it is surprisingly simple to focus, since the focus-action of the composer is super-smooth.
Have a look at result obtained by this technique
Family Supper - LB Composer @ Olympus E-PM2 (f2.8)
(*) The trick of finding the sweet-spot easily is by making use of the fact that focus is formed on a sphere, rather than a plane. Cut trough a sphere, and you will get a circle... In this case, a circle of focus around the center which will be the sweet-spot when focused upon.

Sheep are slow moving domestic animals. But what about wildlife, well, as wild as it gets in one of the most densely populated areas of Europe, if not the World.

Speaking of wildlife, it seems that selective focus defies the lack of a long telephoto lens.
Takeoff! (f2.8)
Here is some Fulica atra, who had enough of being stalked by a bloody human with a camera... so, he took off. I had arranged the sweet-spot and focus was achieved easily.

Interestingly enough, in the photo of the sheep family and the taking off coot, the selective focus seems to be substituting a really long lens.

The selective focus seems to be pulling the viewer into the image, which seems to be more natural than pushing the subject into the viewer's face by a long lens!
Also, the selective focus automatically provides context to the image.
The last example shows that even a center placed subject can look somewhat interesting, provided blur gives sufficient guidance to the eye.
The last example also shows how the focus-sphere works. The branch in the upper left golden ratio is similarly in focus like the waves in the center, although there are several meters between the two items. You will feel, that, now that I said it, the branch will actually disturb you... Yep, that's how difficult is it to get a decent shot with selective focus. Nevertheless fun, I promise!

Thursday, April 17, 2014

Elvis is alive!

The making of a nano dSLR clone...


ELVIS = ELectronic Viewfinder Image Stabilization
Your eyes are not fooling you, this in fact is a Panasonic P&S (Point 'n Shoot). In my view, this is the best P&S camera ever made so far, the Lumix LX7.
But, hang on, this does not look anything like the LX7 as commonly known.
Yep, that's right! And here is why:

I love electronic view-finders! Great stuff! Hence, that's in the hot-shoe. The virtual "R" explained, since the is no mirror to do the R, i.e. "reflex".
However, 100% of the image sensed by the image sensor is reflected, i.e. shown, in the EVL. Actually, the EVL is even better than a (d)SLR's view finder, since it shows all the relevant data, and, acts like a night vision system in low light situations.

Right, the view finder sorted, you may ask what's goin' on with the lens...
The LX7, much like its predecessor, the LX5, has got a built-in objective lens, which keeps moving in and out to the camera's likings (or the zoom command of its owner, for good measures).
Said cameras have a relatively open relationship between the sensors and the surrounding atmosphere. And this is a problem! Driving in and out, the lens mechanism pumps air in and out. Air that may contain dust, pollen, fine particles, you name it, its in there!
The sensors of the LXs are not protected in any way, hence, all the above mentioned junk will collect on the sensor(s).
Hence the next step building up the camera is sealing it from the environment by adding the filter tube, closed by a filter. The picture above shows the LX7 with a tube surrounding the built-in lens while providing a thread to screw filters on.
In my very own set, I am using a 52mm "circ pol" filter, directly connected to the filter barrel, which itself is covered by a UV filter for protection.

Side remark on polari(s/z)ation: in photography, a filter called "circular polarization filter" is a filter that polarizes light in a linear fashion and is mounted in a manner allowing for its rotation about the polarization axis.
In real world of optics, circular polarization is understood as right- of left-handed circularly polarized light, which of course has nothing to do with linearly polarized light at all.
=> What is called "CPL", i.e. "Circular PoLarization" in photography, has nothing to do with light being circularly polarized.

Back to ELVIS!  It is not as small as I liked my LX7. However, having the skin condition I am having, a closed to sealed camera helps a lot to get dust out.
The LX7 already provides an ND filter, on the push of a button, now it is equipped with a polarization filter to take care of reflections.

The LX7 in itself is a brilliant camera, extended as shown above, the LX7 is clearly the most desirable P&S camera available today. Despite the added bulkiness, the accessories mentioned above renders the LX7 close to a professional DSLR.

Sunday, April 13, 2014

Haul the World Through a Pin ...

... aaah, guess I got that all wrong.

Well, it is all about pinhole photography, seeing the word through a hole, a very very very tiny hole, aka a pinhole.

You have seen me experimenting with this before. Yet, I am still on the lower end of the learning curve.
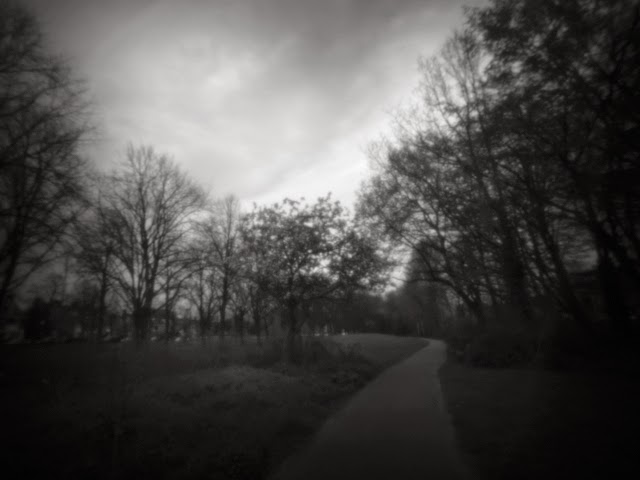
BTW, picture shown here are taken with an Olympus PEN mini2 (E-PM2) using a Pinwide.

More of less the original shot (I increased the exposure digitally in UFRaw)
Yes, a pinhole is very very dark. Not only is it very dark, it challenges the photographer in 2 more ways:
  1. Due to the heavy vignetting of the pinhole, the framing has to be spot on. Any attempt to crop will be clearly visible, in particular when using color.
  2. There is a no Bokeh whatsoever, isolating the subject has to be done by framing.


Here, the highlights a dropped, the shadows brought up, whites a bit up and blacks a tad down
After bringing up the shadows, everything changes. Of course, we want to maintain contrast, hence, the blacks went down, etc. etc. ... you know all about this.
Now it is clear what kind of color vignetting we are dealing with. Some may like this effect, I am personally not so sure about it!
+
Strong color adjustments
What is really disturbing is the overruling purple fringing. In the image above, I desaturated purple entirely. To bring up the colors inside the flowers, I had to increase orange and yellow. I also lowered magenta a bit.

Well, I am still not convinced!
Therefore, it all had to go into black and white.

Converted the above to B&W

Although the last color image was sort of OK, I like the B&W much more.

And now to the strength on the pinhole. The general softness of such an objective set aside, everything in this photo is in focus. Even the branches of the trees in the far background are clearly visible, just like the details in the foreground.

There is a lot potential for artistic photography in pinholes. To get it out is just another story and hard work in post-processing.

Friday, April 11, 2014

Canon PowerShot A1400

As if I had not enough cameras by now, a friend and colleague of mine brought to my attention that having a camera that accepts penlite batteries is a good thing to have, e.g. when on a journey.
And yes, that was my creed for a long time. This is why I actually decided to go for a Minolta DiMAGE F200, which I still have. Actually, whilst writing this, I just pulled the camera out of the bag and decided to feature this legacy digital point and shoot in a post of its own, stay tuned, the posts will have a lot in common.

Back to the Canon PowerShot A1400. A camera, running on AA batteries, shooting in RAW... a vacationers digital dream!
The A1400 a dream?! It's the lowest in the rank, buttom of the line and cheapest in price, just pretending to be usable. Some features clearly target late adopters or beginners, such as the optical view-finder (actually more a peephole, honestly) and the ?-button (HEEEEELP! I need somebody's HELP! So pleeeeaaase help meeeeee! - as I said, late adopters!).

Well yeah, on first sight, the A1400 does not really attractive to the untrained tech eye of a photo enthusiast. But, you're fooled!
CHDK will get you!

Yep, that's right, there is an alpha version of CHDK available for this very camera, the camera that runs on AA-cells! How cool is that?!
Not only does the camera record RAW in DNG format, it also is script-able, e.g. for HDR, time-lapse, etc... As long as you, or someone else for that matters, can program it, the camera can do it.

So, could I resist spending such a huge amount of dough to get me one of those? No, of course not! Do I regret buying the A1400? No, not at all (Non, Je ne regrette rien)!

Right, now that we established that the A1400 indeed shows signs of usability, lets have a look at the feature I disrespectfully disliked earlier in this text.

The Viewfinder
Yes, optically, the viewfinder is rubbish! It really is. The eye relieve is so short, you actually have to stick your cornea against the exit pupil, in order to see something.
However, the optical viewfinder allows you to switch the display off, saving precious power. Focus condition is indicated by a green LED next to the optical view finder. That's really good!
The viewfinder employs zoom optics, giving a rough indication of the framing, that good too!
The framing may be pretty off, however, at least you can see, under bright light conditions, w/o any power consumed, what you are aiming at. Big PLUS!
Yep, the optical viewfinder, however rubbish it is, is great!

The ?-Button
Well, this is the first ever camera I owned having a button with a question-mark on it! At the end, this is not too bad at all! The developers of CHDK obviously had similar feelings about the "?" and added an option to activate CHDK by means of pressing it.
Do I like this button now? Yes, you bet, I do!

Overall Feel
There is another Canon P&S in my bag, able to run CHDK, the IXUS-140. The IXUS is a slick device that easily slides into anyone's pockets... a carry about for everyday use. However, when taking the IXUS out of the pocket to actually take a photo, it feels rather fiddly due to the slick design (which made it so pocket-able) and the tiny control.
In contrast thereto, the PowerShot A1400 provides tougher haptics, due to a rougher surface finish. That's a good thing! It almost feels like the camera want to stick to you hand, rather than sliding out of it. Also, the A1400 provides a DSLR-like grip, to wrap your right hand around... 2 AA batteries live in there, the very batteries the camera was bought for in the first place.
All in all, the A1400's handling is very good.

Into Your Face!
And that is a totally different story now!
Humans have either right or left eye dominance. This is something very personal, like right and left handedness.
Contrary to handedness, the eye dominance can the tweaked with much more easily. Originally I have right eye dominance. However, in my past as an astronomer, yep, that's what I studied at Heidelberg, I trained myself to the using either eye for looking into an optical instrument.
And here is why I mention this anyway. The PowerShot A1400 is so small, with the shutter button on the right hand side, that you can only hold the view-finder up to your right eye. Using the left eye is close to impossible, very challenging at least.
Although, nowadays, I prefer to look though a (dSLR-) viewfinder with my left eye, the camera will be used right-eyed by me.

Conclusions
Do I like this camera? Yes, I do, and I like it a lot!
Finally, a cheap point and shoot, which can be use in a braced position, holding the thing against your face. This not only creates this connection between you and the camera, it also greatly reduces shake!
The following shot was taken hand-held at a roundabout, there is actually a cyclist ghosting through the shot in the foreground.
CONFUSED!
The image confuses me a lot actually. The light show some star-pattern, which would indicate an aperture beyond f/11. At the same tome there is some lens ghosting going on and some odd (non-Bokeh!) blur. It seems the lens is doing something really odd.
The point was, this shot is taken in the braced position and there is very little shake, although the shutter was open long enough to record a ghostly cyclist in the lower right of the photo.


Thursday, April 10, 2014

The Perfect Portrait Lens for MFT?

About this lens, you have seen me writing previously, the Cosina COSINON f=55 F=1.4 M42 screw-mount lens. These lenses are presently on Ebay for really really cheap. I wonder if people actually know what they are selling. Actually I bought 2, just because... well, not really, one for photography, one for astro-photography (check out my bellow-cam, somewhere in this blog).

So, this is how the lens looks like:
Cosina COSINON 55/1.4
You're probably not so much interested in how the lens look , but rather what the importance of such a lens is in the digital motorized auto-focus zoom era.
Well, with some cameras, manual focus can actually be quicker than auto-focus. As to zoom, walking back and forth, given the environment allows for this, is of course slower. Additionally, to compress the background, a lens change has to happen.

On the positive, this lens set me back about €30,- only. For an f/1.4, that is nothing! Right, to make it work, e.g. on the Olympus E-PM2, I had to invest some more dough to get myself an adapter. However, those adapters can be found on Ebay too, where they are shipped from the Far East for free (provided one is patient enough).
The adapter M42-MFT (micro four-thirds) came by mail today. Hence, the possibility to mount the COSINON lens on the Olympus PEN mini2 for the first time.

Due to the lack of a model, I took a portrait of a brick in a wall of my house.
 
scaled brick portrait @ f/1.4

Nothing done to the image other than converting from RAW to PNG and scaling it down.
Have a look at the nice bokeh in both, the foreground and the background... and this very shallow island of sharpness cutting through the frame.

Speaking of, this is a crop of the center line, in original resolution.

center of the image, original resolution
Yes, there is some color fringing going on. As I said, there is no "correction" applied whatsoever.


Now to some technical details, some of my readers are potentially interested in.

The focal length of about 55mm would be referred to as a "normal" when used on a full frame camera (36mm x 24mm), since this is essentially how we see.
The MFT's (micro 4/3) sensor size has a crop factor of about 2. Meaning the field of view on such a sensor would be equivalent to a field of view of a 110mm lens on a full frame sensor.
110mm equivalent falls spot on the realm of portrait lenses, because such a focal length gives enough background compression and still allows to be relatively close to the "subject".

In terms of brightness, we loose two stops! Meaning, mounted in front of an MFT sensor, the lens is now acting as a 110/2.8, relative to full frame gear.

However, there still is a difference between a 110/2.8 used on full frame and a 55/1.4 used on MFT, and an important difference that is! The depth of field!
The depth of field is only dependent on the distance between the lens and the sensor, i.e. the focus distance. Although less of the light that went into the lens from the object side is actually falling onto the sensor (essentially a fourth only), the focal condition did not change at all! The ratio of the distances between the object and the sensor are identical, disrespectfully of how much light falls onto the sensor integrally.

It seems there is a disadvantage of loosing two stops of light.
I don't think so! In portrait photography, we have control over all our light(s). In a studio, we will just have our (three) speedlites at full power rather than quarter power. OK, some recycle time is lost here...
In bright sunlight, there is even an advantage. How often did you experience that you had to use a 3 stop neutral density filter to be able to shoot wide open (depth of field)?! You might have even missed the shot, due to a lack of a neutral density filter, when metering resulted in s/2000 @ f/11 when using ISO 50. There goes your Bokeh! OK, in this example, loosing 2 stops will get us to f/5.6 only, still a little on the deep side, in terms of depth of field. However, adding a 3 stops ND-filter here, will enable us to open to f/2.

Yep, that was a little technical... I admit!

Confused?!

Maybe mathematics will help. Photography has a lot to do with mathematics! I will backup the following statements by suggestions to experiment you can perform with your very own DSRL.

When the focal length of the objective is doubled, the subject's image will be twice as tall/wide on the sensing surface.
Experiment: Set the zoom of your camera to 25mm and place yourself such than an object fills the viewfinder left to right. Now change your zoom to 50mm. You will see that one half of the object now fills the viewfinder left to right. => a factor of 2 in zoom leads to a factor 1/2 in one dimension of the field of view.
That means that the same amount of light is now spread on twice the width.
That also means that the same amount of light is spread on twice the height!
Therefore, a single pixel of a sensor will only receive 1/2 x 1/2 = 1/4 the amount of light, i.e. 2 stops of light.

What the depth of field is concerned, this is a 1-demensional entity, since this is only determined by the ratios of lengths along the optical axis. This dimension, however, is perpendicular to the dimensions (width and height) of the sensor. Thereby, not being influenced by the crop size whatsoever.
You may want to perform a boring experiment with focal distances, object distances and f-numbers... I would not recommend this. It's linear, hence, the changes are less visible and the entire exercise seems a bit boring to be honest.


There you have it. A very cheap legacy lens, bough from the interwebs, can be very convenient when used with modern digital cameras.

Sunday, April 6, 2014

In a Dilemma

Street photography is a genre I am really intrigued by, but still new with. It creates a very strange tension between doing something illegal and/or intruding into a persons privacy. Both is untrue. It's the street, whatever is in public space belongs to the public. Still, the feeling remains.
It happened often that I wanted to take a shot of a scene, covertly, which I was hindered from doing, for one or the other reason. The reservations of going back and take the shot, up to now, were stronger than the wish to get the picture.

So far so good, I am a failure in the genre street, it seems, due to a lack of courage.

However, I found a way around this problem. If someone addresses you, this person took the initiative to make contact. Although such a person might not feel to happy about you taking a photo, adverse feelings can't be shown either (motto: I got you!). Yep, that would be mean... and therefore, I do not suggest this technique.
However, once someone addressed you, you have a chance to react! Crack a joke or at least, say something weird or funny. This will create a contact between you and your "subject". Such a contact will directly lead to eye contact. Keep this eye contact, twinkle if necessary and take a hop shot with you camera. A person laughing out loud (hence the joke), will not able to hear the sound created by your camera's shutter.

As long as you keep eye-contact, in order to distract from the camera, keep making noise as to disguise the shutter's noise.

Here is an example (mind you,  I am new to this and a such cannot point my camera well; neither of the photos is cropped).

This lady addressed me about something, I had time to estimate the frame (hip shot)

I said something which made her laugh... and messed up the framing...
In both photos, I had the lady looking into my eyes, the camera low down at waist level, the shutter was actually triggered by my thumb.
Right... that sort of worked... some cropping and post-pro and I will actually be able to deliver something.

Earlier that day, I tried a very similar thing, and really spoiled. Yep, this went totally wrong! It went so wrong, that I even cannot be bothered to process those files. I messed up! I messed up in my acting and in my photo-skillz... framing sucks too!
Lets have a look at a failure!

I was addressed by a young lady... although I understand Dutch pretty well, I could not follow her immediately. (Oh, that's a chance!) ... Wadd 'dya say? Ey doun understain'!
 
"I am a tourist, I am here to take photos, see.... click!" Well, it's a photo!
And of course, I had my lens set to the wrong focal distance and also I moved too much... The resulting image is of course good for the bin only.

Yeah right!

Realizing my mistake, I came up with some more acting to adjust my focus, which worked for her, but made the surrounding spectators quite suspicious. And, in the flow of acting, I got my framing totally wrong!
Look at the ladies in the reflection of the window...
As I said, that did not work out at all.

What did I learn today? Keep eye contact, don't fiddle with the camera... if the settings are not right, just forgot about the shot.
I also learned that people like to have a laugh, say something nice and light... you may not got a photo, but you potentially will be remembered as a short anonymous amusement.


Thursday, April 3, 2014

Get EVIL ... or at least an EV

I got it wrong! Yep, I admit, I really got it wrong.... when questioning the advantage of mirror-less cameras over point&shoots. Don't get me wrong, I love my P&S, the LX7... later more about that.

Since I was 12 years of age, I was using SLR cameras. Of course I had several lenses for several purposes! My workflow was to select the lens for the task, put it on the body carrying the film for the task (no auto-ISO or auto-WB at that time) and stick my eye (the right eye in my case) into the viewfinder. This is how I photographed for decades!

And now you come and take the viewfinder from cameras?! What's the point?!
Well, actually, I bought my Canon G15 because it still had a viewfinder.  Right, this is not a particularly good VF, but, it still works in the old skool way.

Old skool? What do you mean? (I hear you thinking).
A viewfinder, at least the way I personally use it, will create focus when the eye watching it is focused at infinity. Urgh?! I feel you thinking... why that?!
Here's a trick I use for many years (I have not yet seen any photographer telling this trick!): your dominant eye should use the viewfinder of you camera, while the non-dominant eye observes the scene as such!

Dominant eye, what is that?! The dominant eye is the eye you would use to aim a gun (put is simple terms). The dominant eye observes the "subject" (in photography term). The non-dominant eye serves perfectly for observing the scene, setting the background etc.
=> You got 2 eyes (if you are lucky!), use both!

Right... EVIL (EV at least)...

There are many obvious advantages which an electronic viewfinder (EV) can provide:
  1. it shows the field the sensor sees,
  2. it shows the image as amplified by the system,
  3. it shows data about exposure, aperture, shutter speed, ISO, etc.
But, there are even more important advantaged an EV can provide:
  1. holding the camera close to the face (maybe even hiding it under clothing, e.g. hiding under a hood)
  2. holding the camera very close to your face will force a "brace position", which stabilizes the shot
  3. the EV will enable you to see the scene through one eye and the frame trough the other eye, both in focus...
  4. in low light conditions, the EV will show a scene, which will be invisible to an OV (optical viewfinder).
A main advantage of using EVs to me is that I see all setting of the camera at once.


However, the main advantages of using EVs over BackBodyScreens are:
  • you're not sticking out your camera in someone's face
  • you're not sticking out a camera at the length of your arms, creating additional visibility
  • you're not sticking out your camera at a lever (your arm(s)), creating unwanted shake
  • you are actually aware of your gear!


A New Arrival - Going Old Skool - Hol(e)y Goodness

Don't be fooled by the title, being single, I still have no kids, ladies, anyone?!
Yeah, right... that's the platform for this...

Back to business, i.e. photography.
After a relatively short, wait, which felt like an eternity of course, the Pinwide by wanderlustcameras.com fell through my "brievenbus" (in Holland that is a slot in your front-door, not a box outside the house, very convenient in bad weather!).
Right, back to the Pinwide. Some would call it a "lens", but it is not. Some would call it a "photographic objective", which it eventually is. The Pinwide just does not use any optical lenses, i.e. bubbles of glass where light is pushed through.
As the name suggests, the Pinwide is just a pinhole, a very very very small hole. That's it!

To be honest, I though the price on "glass" without glass was pretty stiff in the first place. But going old skool should be priceless anyway. Hence, the $US40 for the camera objective plus $US10 shipping just had to be spent. Speaking money, you may ask if it is worth spending this amount for a very small amount of round nothing? Hell yes it is!

Mail came late today, hence, I made my first shots with the Pinwide during dusk.
Never the less, I took a tripod, the Olympus E-PM2 and the Pinwide... and got out! Of course, people came along asking stupid questions... arghhhh, haven't you seen a guy with a camera on a tripod before?!!!!

There are essentially two options to use the pin-hole: 1) on a tripod or 2) with very high ISO.

Here are test with both. Let's start with the second option, high ISO, actually ISO 25600, the highest the E-PM2 can go.
s/15 @ ISO 25600 scaled to 640x480
s/15 @ ISO 25600, original resolution, cropped
That look old skool, doesn't it?!
As said before, this is dusk, at s/15 this shot could have been done handheld, hands down, so to speak.

Now, lets look at the other end of the scale, the first option. My Olympus E-PM2 goes down to ISO 200 only. Mind you, the Panasonic LX's lowest ISO is 80!
OK, here it comes, sorry, I changed my position due to people coming up again, nagging about, socializing they call this...
15s @ ISO 200 scaled to 640x480
15s @ ISO 200, original resolution, cropped
Alright, this is old skool. At the days of pinhole cameras, i.e. camera obscura, color film did not exist. Ups, mistake on my side, to the time of "camera obscura" film did not exist, neither color, nor black&white. We are hence talking about pinhole cameras. A certain David Brewster took the first photograph ever with such a camera. Yep, old skool! This will be subject to an experiment in the future, stay tuned (in my very own youth, I experimented with making paper light-sensitive by soaking in a saline solution).

Back to modern days possibilities. The images shown above did not receive any treatment. Other than converted from RAW into 100% quality JPG and either scaled or cropped.
Lets look at one that actually was treated, not much though.

converted to B&W, scaled, brightness and contrast adjusted
The 15s @ ISO 200 image was converted into black&white using GIMP by means of desaturation based on luminosity.


Physics live! The side effect of the Pinwide... very cool!

As you can see in the color images, diffraction kicks in, so small is the pinhole. You get actually color-vignetting.
In the center of the images, all wavelengths are essentially following the laws of geometric optics.
At the very edges, diffraction kicks in, meaning that light depending on the wavelength gets more around the corners at sharper or shallower angles. From the color distribution of the images one could actually determine the diameter of the pinhole.
For full benefit of a pinhole camera objective, i.e. a very very very deep field of focus w/o any adverse effects, I am looking for a "Pinlong" to be made. Actually, I will contact the guy at wanderlustcameras about that. Such an objective will stay in the region of geometric optics, thereby not introducing all that diffractive delusion.
In that context, a Pinportrait would be quite nice to have too ;-)


Ophthalmology live!

Probably not even the makers of the Pinwide have thought about this. If you hold the Pinwide to either one of your eyes, no camera attached of course, and pointing it towards a homogenous source of illumination, preferably placing the object side of the Pinwide towards your eye(s), you will actually see shadows of the interior parts, such as veins, of your very own eye(s)! How cool is that?!
Why does this happen? Because the light entering your eye is extremely hard, in photography terms.

Again the question, was the Pinwide worth the money? Ohhh yesss! Every single penny!