Showing posts with label long exposure. Show all posts

Sunday, September 25, 2016

Huawei P9 (long exposures)

The camera of the P9 sports to modes for which a stable mount, such as a tripod, is required: Night Shot and Time-Lapse. Manual shutter settings allow up to 30s exposure in the pro-mode.

How to hold the camera

Of course there are some tripod options available for smartphones. However, those would form an additional piece of kit, which probably will stay home for the most of the time. Also, the ones that are a bit lightweight are also considerably flimsy and might vibrate a while when used with a bigger phone like the P9.

Here is my solution, use a wallet-type case:
Mine cost me €15.  The good thing is, the case will always be with the phone, and so will be the function as a stand. Of course one will need a conveniently shaped handrail, wall, table, window sill, etc., with view. Obviously, this arrangement favours landscape type photographs.
Pro: no extra part to loose... if you lost the case, I guess, you lost the phone.

How to trip the shutter

The next challenge, trigger the shutter w/o introducing vibrations. The built-in camera app offers some interesting alternatives to touching the display.
  • timer
  • audio control
  • volume bottom
Timer delayed shutter release is a technique often used in absence of a remote shutter release. There are some pros and cons with that method. For long exposures, the cons are essentially absent, in particular with a 10s delay. Pro: no extra part to loose.

Audio control, in my view, is only useful in the "above certain dB level"-mode.  With the P9 a finger snip works just fine. Certainly, this method requires a relatively quiet environment. Pro: no extra part to loose.

The volume bottom is mounted on the phone itself, so, what the point, you might ask. Well, I much prefer this as a shutter release over the touch-screen, during regular photography. For long exposure, however, you don't want to touch the phone, right? Well, firstly, think of the timer mentioned above.
But even better: use the headset provided with the P9. Not only do the earbuds sound great, the headset comes with a volume bottom. Guess what, when the camera app is set to releasing the shutter by the volume bottom, you got yourself a real cable shutter release. Con: don't loose the headset!

Tip

The autofocus can be confused, so, I do advise to use manual focus in the pro-mode, if possible.


Example

The following photo is shot from my roof-deck. Wallet case as holding device. Audio controlled shutter, autofocus set to the streetlight in the center. Shooting mode: Night Short.

Monday, July 25, 2016

Long exposure 2/2 day

Over the years I was asked what my tricks for long exposure where under certain circumstances.
It all depends on the circumstances!
First of all, the problem with long exposure is that there are neither cameras nor light meters made for this task.

In this post, I would like to cover the day-time aspect of long exposures.
The content of which I assign a new rule to, the 10-stop rule.

For day-time long exposure, many different filters could be used. Some cameras have got a 3-stop ND-filter builtin, but this post is not about 3 stops...
10 stop ND-filters are known by many names. Just make sure your's actually attenuates by 10 stops.
Here's the maths (equivalent exposures), constant ISO assumed:

  • 0: 1s/1000
  • 1: 1s/500
  • 2: 1s/250
  • 3: 1s/125
  • 4: 1s/ 60
  • 5: 1s/30
  • 6: 1s/15
  • 7: 1s/8
  • 8: 1s/4
  • 9: 1s/2
  • 10: 1s/1
OK, what does that mean when putting a 10-stop filter in front of a camera?
It means that when your light-meter indicates 1s/1000, you should set your camera to 1s, in order to get a regular exposure.

So, your scene would require a and exposure of 1s/1000, without any filter, the addition of a 10-stop filter, will get you to 1s for the same exposure.

So, if your exposure would call for a 1s/500, you obviously would like to expose for 2s.

Consequently, the exposure can be calculated as follows, with S being the shutter time of the light-meter reading:

Exposure time in seconds = 1000 * S

Example:
The meter calls for 1s/15 exposure, you would set the camera to 66s.

To smear out any sort of traffic, a minute should be plenty. Mind you, this kind of photography would usually ask for an aperture between f/8 and f/11.

Sunday, July 24, 2016

Long exposure 1/2 night

Over the years I was asked what my tricks for long exposure where under certain circumstances.
It all depends on the circumstances!
First of all, the problem with long exposure is that there are neither cameras nor light meters made for this task.

In this post, I would like to cover the night-time aspect of long exposures. The content of which is also known as the 6-stop rule, converting second into minutes.

This technique involves at least a digital camera having ISO 6400.

Lets have a look at equivalent exposures shutter vs. ISO:

  • 0: 1s - 6400
  • 1: 2s - 3200
  • 2: 4s - 1600
  • 3: 8s - 800
  • 4: 15s - 400
  • 5: 30s - 200
  • 6: 60s - 100
The 6-stop rule converts seconds into minutes when using ISO100 rather than ISO6400. Why is that important? Many Astro-photographer are using ISO100 film. Therefore, a quick estimation can be made with an ISO6400 digital camera, before spending hours of waisting film.

Thursday, April 3, 2014

A New Arrival - Going Old Skool - Hol(e)y Goodness

Don't be fooled by the title, being single, I still have no kids, ladies, anyone?!
Yeah, right... that's the platform for this...

Back to business, i.e. photography.
After a relatively short, wait, which felt like an eternity of course, the Pinwide by wanderlustcameras.com fell through my "brievenbus" (in Holland that is a slot in your front-door, not a box outside the house, very convenient in bad weather!).
Right, back to the Pinwide. Some would call it a "lens", but it is not. Some would call it a "photographic objective", which it eventually is. The Pinwide just does not use any optical lenses, i.e. bubbles of glass where light is pushed through.
As the name suggests, the Pinwide is just a pinhole, a very very very small hole. That's it!

To be honest, I though the price on "glass" without glass was pretty stiff in the first place. But going old skool should be priceless anyway. Hence, the $US40 for the camera objective plus $US10 shipping just had to be spent. Speaking money, you may ask if it is worth spending this amount for a very small amount of round nothing? Hell yes it is!

Mail came late today, hence, I made my first shots with the Pinwide during dusk.
Never the less, I took a tripod, the Olympus E-PM2 and the Pinwide... and got out! Of course, people came along asking stupid questions... arghhhh, haven't you seen a guy with a camera on a tripod before?!!!!

There are essentially two options to use the pin-hole: 1) on a tripod or 2) with very high ISO.

Here are test with both. Let's start with the second option, high ISO, actually ISO 25600, the highest the E-PM2 can go.
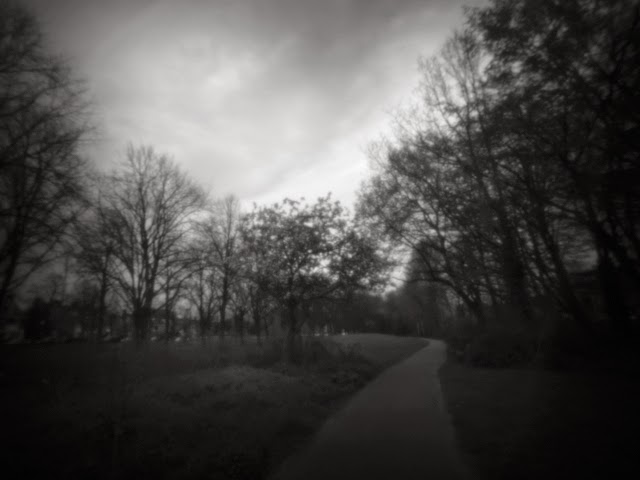
s/15 @ ISO 25600 scaled to 640x480
s/15 @ ISO 25600, original resolution, cropped
That look old skool, doesn't it?!
As said before, this is dusk, at s/15 this shot could have been done handheld, hands down, so to speak.

Now, lets look at the other end of the scale, the first option. My Olympus E-PM2 goes down to ISO 200 only. Mind you, the Panasonic LX's lowest ISO is 80!
OK, here it comes, sorry, I changed my position due to people coming up again, nagging about, socializing they call this...
15s @ ISO 200 scaled to 640x480
15s @ ISO 200, original resolution, cropped
Alright, this is old skool. At the days of pinhole cameras, i.e. camera obscura, color film did not exist. Ups, mistake on my side, to the time of "camera obscura" film did not exist, neither color, nor black&white. We are hence talking about pinhole cameras. A certain David Brewster took the first photograph ever with such a camera. Yep, old skool! This will be subject to an experiment in the future, stay tuned (in my very own youth, I experimented with making paper light-sensitive by soaking in a saline solution).

Back to modern days possibilities. The images shown above did not receive any treatment. Other than converted from RAW into 100% quality JPG and either scaled or cropped.
Lets look at one that actually was treated, not much though.

converted to B&W, scaled, brightness and contrast adjusted
The 15s @ ISO 200 image was converted into black&white using GIMP by means of desaturation based on luminosity.


Physics live! The side effect of the Pinwide... very cool!

As you can see in the color images, diffraction kicks in, so small is the pinhole. You get actually color-vignetting.
In the center of the images, all wavelengths are essentially following the laws of geometric optics.
At the very edges, diffraction kicks in, meaning that light depending on the wavelength gets more around the corners at sharper or shallower angles. From the color distribution of the images one could actually determine the diameter of the pinhole.
For full benefit of a pinhole camera objective, i.e. a very very very deep field of focus w/o any adverse effects, I am looking for a "Pinlong" to be made. Actually, I will contact the guy at wanderlustcameras about that. Such an objective will stay in the region of geometric optics, thereby not introducing all that diffractive delusion.
In that context, a Pinportrait would be quite nice to have too ;-)


Ophthalmology live!

Probably not even the makers of the Pinwide have thought about this. If you hold the Pinwide to either one of your eyes, no camera attached of course, and pointing it towards a homogenous source of illumination, preferably placing the object side of the Pinwide towards your eye(s), you will actually see shadows of the interior parts, such as veins, of your very own eye(s)! How cool is that?!
Why does this happen? Because the light entering your eye is extremely hard, in photography terms.

Again the question, was the Pinwide worth the money? Ohhh yesss! Every single penny!


Saturday, January 4, 2014

Legacy Series, long-exposure ToUCam PCVC-740K

ToUCam PCVC-740K long-exposure modification


Background Story

Please have a look at the superb pages available all over the globe. Many thanks to Steve Chambers for sharing his findings with the internet-community! Please have a look at Steve's page to understand that it will not be allowed to use the information provided for purposes of profit.
Three pages to be mentioned as being a very good source for rock solid informations:
(1)   http://www.pmdo.com/wintro.htm
(2)   http://members.bellatlantic.net/~vze29wzh/toucam740mod.htm
(3)   http://www.aludobson.de/CCD/umbau_einer_toucam_pro.htm


Please note that whatever you do to your camera is up to you. What I disclose on my pages is based on personal experience. Other setups (OS, software, soldering skills) might lead to other results, don't blame it on me.

Schematics

This is just a tiny little part of it. For convenience I decided to used different NAND gates than shown in (2). Reason being that the ugly style / dead bug / Manhattan method appeared to be the appropriate design choice to me for an incomplex circuit like this one. In dead bug it is easiest to bend pins together... pin 1 and pin 2, pin 3 and pin 12. Half the work done w/o any effort.


Warning

If this is your first SMD-sized project, please do not start directly... do some practice before. A webcam certainly is ruined very very quickly!


Photographs...


Overview of the battle-field side of the toucam's PCB, cuts already being applied


Practice cut.... get rid of additional light produced by the green SMD-LED


These cuts are essential (see link (2) mentioned above), cutting too much of the mass-plane does not harm, but... watch out for the other leads! I used a sphere type diamond-tool to mill away the leads to be disconnected.


Wires do not need to go around the PCB in any case. Here are two vias which can be used to solder [Pad8] to pin 1 of the 4011 (lower wire) and [Pad10] to the potential switch (upper wire). I used 0.2mm "magnet wire" (enameled copper wire)...
In these places, the wires are soldered to the PCB-vias. BTW: finally I did not add a switch to the cam... what for anyway?


The leads (0.2mm magnet wire) connecting "Pin8" to pin 11 (4011) and [Pin10] to the 100k resistor. Both wires use "foreign" vias to channel to the side of the PCB (as long as the enamel varnish is not scratched at the tunneling portion of the wire, no problem can be encountered).


Both sides of the story.... the blue wire is the power supply for the 4011. (Sure, I could have searched for another place to get 5V from.... but, time is money, isn't it?).


And... on the other side of life....  Dead bug "mounted" (cyan-acrylate) 4011 with 100k resistor. In the upper quarter of this image the connection between [Pad8] and pins 1 and 2 of the 4011 is visible. The lower quarter show the "tunneled" leads to pin 11 (4011) and to the 100k resistor.


Dead bug 4011.... the two blue wires are the link to the parallel port connector.


Switch?

You will need the switch only if you intend to take still-image with the camera in the common way. For video the camera will still be working fine with [Pin10] of the 16510 being connected to the 100k resistor.
Personally I omitted the switch...


Have a look at an observation using the camera recording the Great Orion Nebula (M42) in combination with an ETX-70.