Showing posts with label astronomy. Show all posts

Thursday, July 18, 2024

Peaking through the soup

As a regular reader of my irregular blog, you might have noticed that I got myself a Dwarf-II some time ago.
Just lately, I spent some more time with the device, shame on me. 

You may know that I do live in the Netherlands, one of the worlds most light-polluted regions. On top of that, we have pretty murky skies in general. Not the best for astro-stuff.
Having earned my astronomy degree in the field of open stellar clusters, stellar matter was always interesting to me. Most astrophotographers are focused on colorful images of nebulae, which I do appreciate myself too.

Colorful, i.e. full spectrum images, require a pretty clear sky. Again, no such thing in NL. 
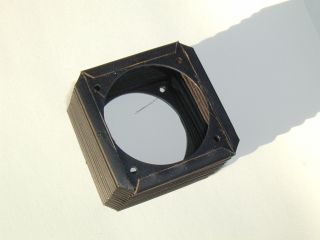
Some weeks ago, I ordered 800nm IR pass-band filters. Those arrived lately. Certainly those are not really narrow-band, but that's OK. 
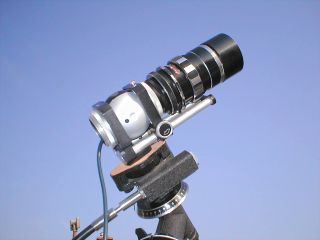
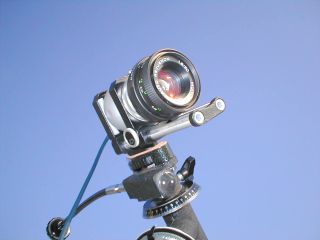
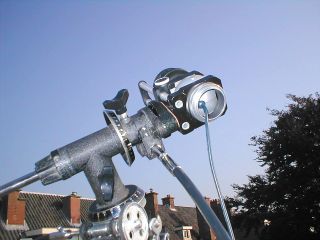
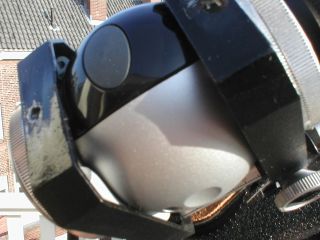
The main idea was to use the filter(s) in front of the Dwarf-II's telescopic lens. 
The Dwarf-II has an option to pass IR to the sensor. This has got some implications:
First of all, IR light can reach the sensor (daaahhhh!). Not so fast, all other smart-telescopes do not let IR trickle their sensor.
Secondly, this enables an almost monochromatic imaging mode when used with an IR band-pass filter. Well, that is exactly what I described above.
Thirdly, IR astronomy still works in murky conditions, somehow at least.
A minor forth point might be that the RGB-filters on the image sensor might not have a great effect on IR radiation, thereby keeping up the resolution of the sensor.

Why am I so enthused about monochromatic imaging? When taking images of full-spectrum radiation sources, such as star and galaxies, one does not need any other "colors". The particular advantage is that all light from a source will be focused at the same place on the sensor, i.e. not chromatic aberration issues. 

The added benefit of IR is of course the reduced influence of the atmosphere. 

However, when collecting images one needs to understand that the portion of light collected is restricted. Therefore, one might consider to experiment with amplification. 

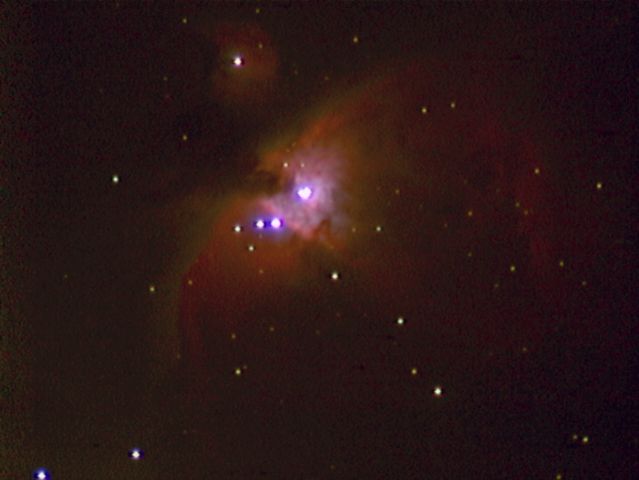
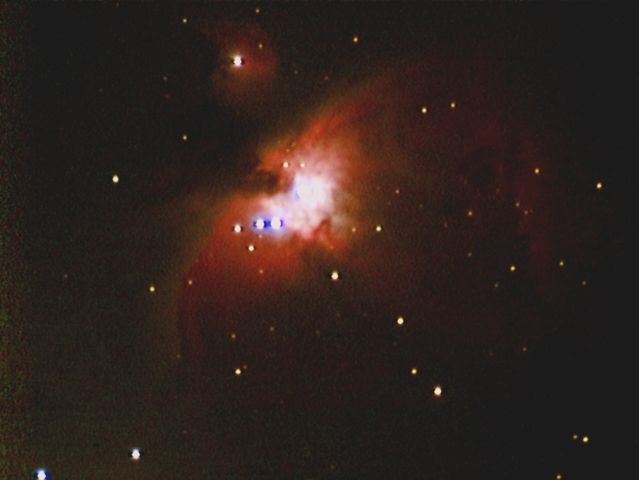
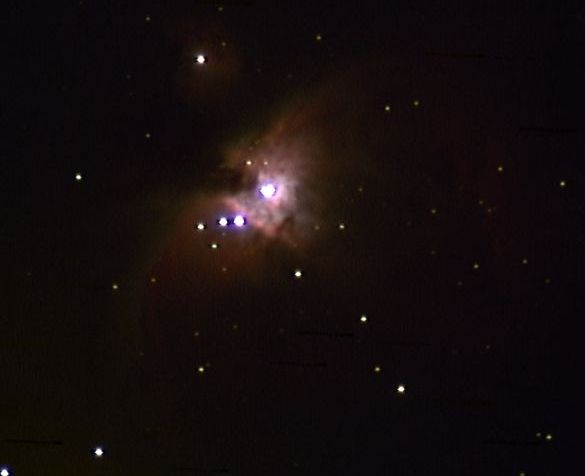
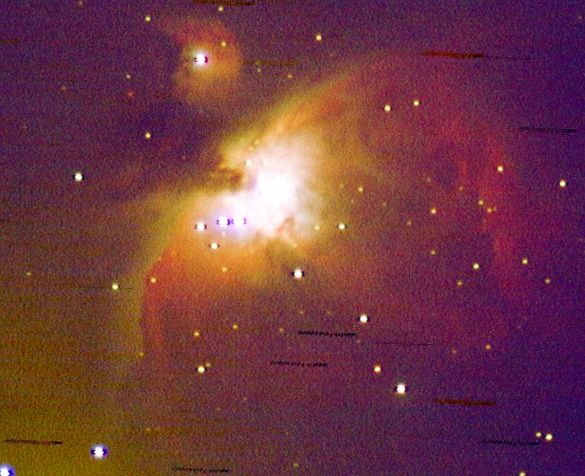
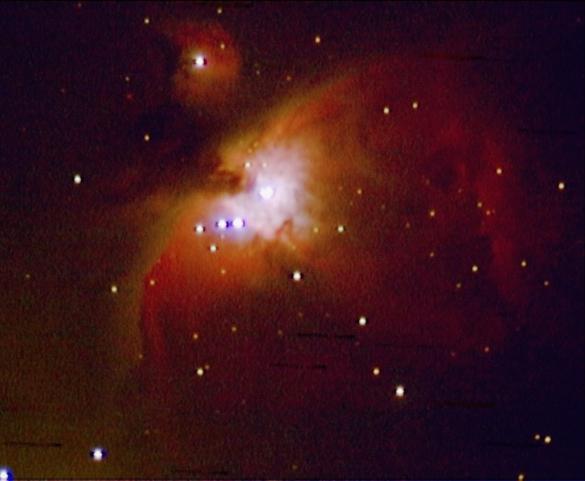
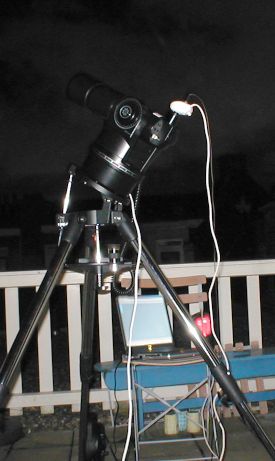
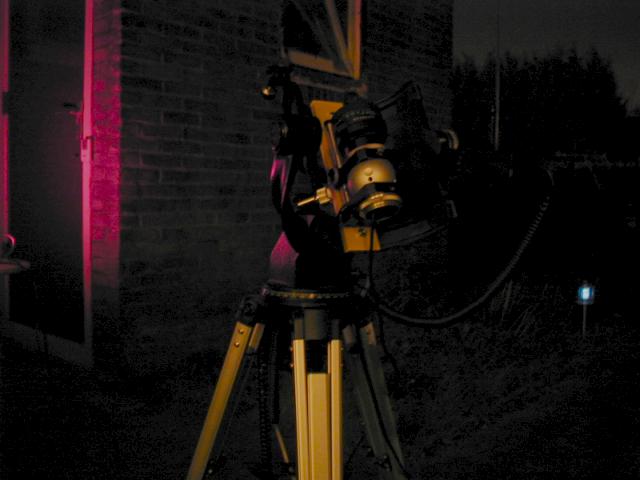
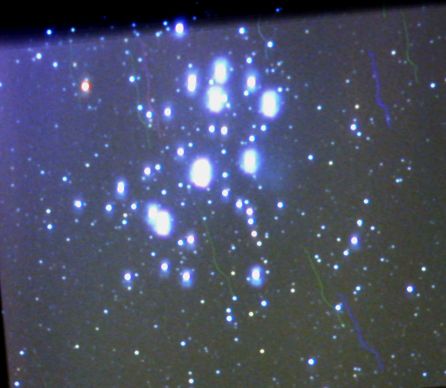
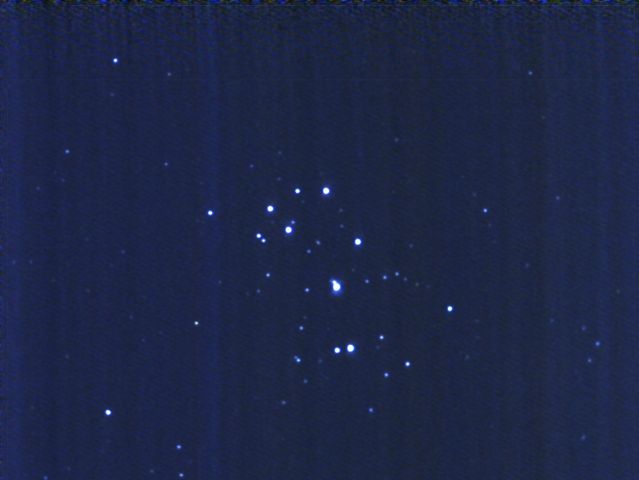
The following images are screen-captures from my table during acquisition. There is no post-processing involved at all. You also see a photo of the sky conditions during the data acquisition.

stack with statistics

spectrogram and curve

conditions during data acquisition


Wednesday, December 24, 2014

The Q-code

Hi there, sorry for the misleading title, this post is not about amateur radio, this still is about my photography adventures.

Coming from SLRs, I had severe doubts about the use of mirror-less system cameras. Yep, past tense, since the purchase of my first digital system camera, the Canon EOS-M my appreciation for mirror-less digital cameras changed. What triggered my initial interest was that the EOS-M employs an APS-C size sensor and no mirror to flip up and shake the camera. ("Haha", I here you thinking, "mirror, no mirror, what is this guy all about"). The initial plan was to mount the EOS-M behind a decent telescope, for astro-photography (makes sense now?). Whatever the EOS-M's reputation is, this is a very good camera, not only for video, but also for stills, despite the slow auto-focus.

From there, I moved down in sensor size (MFT aka m4/3), by getting an Olympus PM-2, which I love a lot.

Now my interest for mirror-less cameras was ignited.
Following the scene, it did not take long and I was intrigued by Pentax's Q system. Sooooo small! Well, also the sensor. Hence, I had my doubts, and stayed away from the Q.

And now, it struck me, the Q has got no mechanical shutter in the body, the sensor is back-lit, the firmware has got a built-in intervalometer and there are plenty of adapters available (including T2).
For astro-photography, the Q system might just be the thing!
Also, the Q-system sports in-body "shake reduction" by sensor shifting, allowing for manual/old lenses to be used with image stabilization.

So, I got one.

Now, out and about, I learned to love the Quirky little camera. Small enough to fit in any of my coats, including a wide arsenal of lenses.
Concerning which, I presently own the following genuine lenses:

  • 01 - standard prime (8.5mm f/1.9)
  • 02 - standard zoom (5-15mm f/2.8-4.5)
  • 04 - wide toy lens (6.3mm f/7.1)
  • 05 - toy tele-lens (18mm f/8)
  • 06 - tele zoom (15-45mm f/2.8)
  • Holga lens for Pentax Q (10mm f/8)
Some of the genuine lenses are supplied with a lens internal leaf shutter and a neutral density filter. Of course you know what that means... using strobes or speedlights at very fast shutter speeds.
When using lenses not equipped with a shutter, e.g. legacy glass of the toy lenses, shooting is entirely quiet, due to the electronic shutter. On the downside, the electronic shutter can be used up to 2s only,

By now, I also own a Q7 body. Despite the Q and the Q7 bodies have the most recent firmware, there are remarkable differences.
While the Q seems to handle a lot more easily, the Q7 got some feature I really miss on the Q.


Advantages of the Q
  • metal body, creating a very balance experience
  • intuitive dial customization
  • stereo audio in video recording

Advantages of the Q7
  • bigger sensor
  • records RAW when using smart filters or effects
  • slightly elevated buttons
There are probably more differences, but those are the ones that struck me most.
To me, it is impossible to pick a winner between the Q and the Q7. Although, the Q gets out a lot more often, probably because of the balanced feel of the metal body camera.

Another thought about the Q-system: C-mount lenses, which will fit the sensor just fine and can be really inexpensive.

Should you get a Q or a Q7? Well, I don't know! Just don't get a Q10, which is just a Q in a plastic body.

Saturday, March 8, 2014

Getting Closer

Here it is, the first ever real shot through a telescope using the Canon EOS M. As mentioned before, the main reason for obtaining the EOS M was to dangled it behind a telescope!

If you have seen my web-page, I am mainly interested in wide field astrophotography, using long-exposure modified webcams and wide open fast scopes.
Tonight, I felt more of doing something quick and simple, the moon is showing a nice age, hence, the order of the day, a long lens with a short shutter time.

Canon EOS M @ Sky-Watcher MC90 (1250mm)

Of course, there if so much light that the settings could be really tuned towards low noise.
To establish focus, I actually used Magic Lantern's focus peak, despite my concerns about the health of the camera.

Parameters of this shot:
  • ISO 100
  • s/13
  • WB = daylight
  • RAW format
  • D=90mm
  • f=1250mm
  • f/13.9 (obviously)

 This shot was taken on a tripod but w/o any remote shutter release.

Post-processing in GIMP using a bit of noise reduction, a hint of sharpening and desaturation by luminosity. Finally, the image was scaled. No cropping though!

Just for your entertainment, this is what the colored pic looks alike:
Color as seen by the sensor
More to come!

Thursday, February 27, 2014

Heavy Metal for Bokeh!

New glass, well, old glass, new however to my collection of lenses, arrived today.
For not too much, I was able to obtain a COSINON 55mm F=1.4 lens, made by Cosina. Just for the sake of completeness, this lens has got an M42 mount.

Two different plans for this lens: 1) digital photography with the EOS M or the EOS 350D, 2) astro photography with the "bellow cam" webcam adaptation.

Concerning the first plan, of course this will be all manual. Remember the M (manual mode) and metering for exposure?

- With the EOS 350D, this works like charm. The front selector next to the shutter release sets the shutter speed, aperture, old skool, at the lens' aperture ring. Focusing with the 350D is a bit tricky. It seems that the light paths to the sensor and through the viewfinder are not matched in the entry level DSLR, hence, the focus on the sensor is a bit closer than the one in the viewfinder. The very shallow depth of field makes it therefore difficult to get sharp images right away.

- As to the EOS M, in manual mode, the selector wheel at the back can be set to shutter speed. Since there is no mirror involved in the M, focusing is really easy. Due to the shallow depth of field, you can literally see the focus rolling over the sensor.

Of course, both cameras employ aperture priority, just in case you are tired of metering.

With both cameras, the center of the old lens shows beautiful circular bokeh. Moving towards the edges, of course, this get a bit distorted...

The second plan, the bellow-cam, my bellow-cam. This is a QuickCam QC4000pro, modified for long exposures, see earlier posts on this blog. The macro photography bellow is actually designed for M42 lenses, hence the F=1.4 lens could be a very good light collector.

Of course, the also in plan B for using the lens together with the EOS M for wide-field astro photography.

Sunday, February 23, 2014

Light and Bokeh!

I got lucky lately. The action site ebay made me winner on a Cosinon F=1.4 f=55mm M42 lens. There are some options to use that lens:
  • on any of my old M42 film SLR bodies
  • with the bellow-cam astro-webcam
  • on the Rebel XT in manual mode
  • with the EOS M (in manual mode)
You can imagine that I can't wait to receive the lens ;-)

Monday, February 17, 2014

Old Glass on the EOS M

Here is another reason for me having obtained the Canon EOS M.

From my early days in photography, I still own some old lenses, mainly M42. Of course they are all manual focus, old skool! Some of those lenses made amazing photographs. It would be a shame to just let them rot in a corner.

Of course, the most obvious choice would be to buy Canon's EF-M to EF-S adapter, making available to the EOS M all Canon AF lenses. And with some additional adapter(s), lenses with all sorts of different mounts. However, Canon's adapter is rather expensive, especially when considering fully manual lenses only (no electrical connections required).

There are some makers/vendors of after market adapters, in particular from China, which offer purely mechanical adapters of decent quality. The price for those are really low, so I gave it a try and ordered  "EF-M to EF-S" and "EF-S to M42" adapters. (to find them: google, ebay, youtube, etc.)

First impression on the rings from China. Machining is very precise and the quality appears solid. Mounting the "EF-M to EF-S" ring of the EOS M shows a feature I am not so happy about, nevertheless can live with. The EOS M's locking mechanism goes "click", but there is no mating means in the adapter ring, hence, the ring can be turned further, with just a little force. Maybe hole for the locking pin is too small.

The "M42 to EF-S" ring clicks in place just fine, no issues here.

For the fun of it, I mounted a 35mm f/2.8 lens, which could be a very good lens for street-photography.

Here come the critical bit connecting the old to the new world:
  • Set your lens to manual, so that the iris acts according to your settings ignoring the SLR-command pin.
  • In your EOS M, set the Custom Function item 7 "Release Shutter w/o Lens" to "Enable", so that the camera ignores the fact that it can't sense a (high tech) lens.
  • Put your EOS M in either "Av" or "M" mode.
  • You may want to choose MF (manual focus), although I am not sure if that makes any difference.

In "Av", life is nearly as easy as with a stock lens. Choose your aperture at the lens' aperture ring, focus and shoot. The shutter (and ISO w/ ISO on auto) will be determined by the camera. Of course, if you are old skool (like me), you will set your ISO yourself... At least to my time, there was not "auto film", the only option I had was taking a body with a certain spool inserted to choose an ISO sensitivity, usually either 50 or 400... As I said, old skool!


In "M", life is what it used to be, 30 years ago.
  • Select the ISO suitable for the situation, please do not use auto-ISO!
  • Decide on a shutter speed according to the task.
  • Adjust the aperture while taking meter readings by half-pressing the shutter button.

And here you have it, this is why I think the Canon EOS M is one of the best mirrorless cameras to buy at the moment:
  • It has a poor reputation for slow AF speeds...  who cares when manually focusing old lenses?! For that reason, the price for this camera is pretty low presently!
  • After market adapters are cheaply available.
  • The EOS M is customizable by the Magic Lantern software (*).  

All in all, now that all my parts are in, I hope to be able to do what this camera was intended to in my house: Astro-Photography. First attempts using the 22mm prime lens, see earlier post, were promising.
Manually focusing the EF-M STM lenses proved difficult.
However, now that pure mechanical focusing is possible, using legacy lenses, there is light at the end of the tunnel, literally. In particular since I envisage to use the adapter ring to mount the camera to my T2 equipped telescopes.

(*) For astro-photography, ML promises to replace a setup of a dedicated computer wired up to the imaging camera, i.e. by taking timed bulb exposures.


Wednesday, February 12, 2014

First Light

... that's what it is called, when a telescope see the first ancient photons, i.e. astronomical photons.
First light, that's what it was for my EOS M tonite.
To keep things simple, I just put the camera on a regular tripod and took some shots of the night sky. No guiding, no nothing, just some shots. My experience told me to not expose beyond 10s, so that start will not create serious trails.
Just for the fun of it, I took some shots of the 7 sisters cluster, using the EF-M 22mm prime @ f/2. The shutter was at 10s and ISO from 100 to 800 (manual focus!).

Mind you, I am living in an extremely light polluted place! The moon provided some unwanted light and there was no filter involved in the shot...

After some GIMPing, this is what the picture was resulting in...
M45 (Pleiades / Seven Sisters) and Hyades open stellar clusters

I wonder what the Canon EOS M can do when hooked up to a real telescope.

Update:
I had to replace the uploaded photo with a linked image, since blogger keeps "improving" images, also by removing "hot pixels", in this case, most of the stars...

Wednesday, January 29, 2014

Lunar Photography on the Cheap II (gratis/free)

Yesterday I showed how to take a lunar shot with a simple point&shoot camera with a 8x zoom lens. Of course, the trick was that this inexpensive camera is able to shoot in RAW (thanks to CHDK).

Towards the end of the post, I mentioned that I used commercial software, i.e. Photomatix, to deal with the "develop" part of things. Further I stated that this process would potentially be possible with "free" software.

Today, I gave it a try with Luminance HDR (version 2.3.1), which is free software, to my knowledge.


Preparation

Luminance HDR asks for bracketed frames. Well, with my single shot, I only got one frame. So I used a very common HDR trick, namely creating more frames, differently "exposed" by software. Mind you, I am shooting DNG (digital negative).
Here is how this trick is done (with is free software by know):
  • open the shot in Rawtherapee
  • go to the EXPOSURE menu
  • click on 'Neutral' (this should bring everything to default values)
  • export the image using TIFF-16bit (this is your 0Ev shot)
  • drop the exposure to -2Ev
  • export the image using TIFF-16bit (this is obviously your -2Ev shot)
  • raise the exposure to +2Ev
  • export the image using TIFF-16bit (this is obviously your +2Ev shot)
Done! You now got 3 frames of identical size and format with different exposure values. That's what HDR-software likes!

The first results in Luminance HDR were not that great. Actually, they were so bad (a lot of grain and noise, over-exposed bits and what not), that I decided not to show those. The software is not easy to use, so I will give it a second try (see below).


Gratis

There is another bit of HDR-software available "for free", i.e. gratis. So we are not dealing with free software here, however, one can use this program without paying for a license.
The program is called FDRTools Basic.

Having loaded the 3 frames into FDRTools, the results were better, but not really satisfying yet. It appeared that the +2Ev frame was not serving any reasonable purpose, hence, I excluded this frame from the process (this is a very nice feature of FDRTools, it is like making invisible a layer in GIMP).
And guess what, the result was instantaneously much better than yesterday's Photomatix results!
Here is the re-sized output, converted into PNG:
2 frames pseudo HDR using FDRTools Basic


To me, that was a stunning result, coming from gratis software! A lot less noise than in yesterday's attempt.

Still, this photo could be slightly improved in GIMP, using the masking technique I explained in the previous post, i.e. the sky was treated with 'wavelet denoise' and the moon with 'wavelet sharpen'.
after GIMP
In the original 16 Megapixels image, the difference is somewhat visible. The above shown scaled down versions look almost identical to me.


Free

And here is the promised text about the entirely free solution.
Learned from my experience with FDRTools, I only loaded the -2Ev and the 0Ev frame into Luminance HDR. So for so good, but now the hard part.
Luminance HDR offers a lot of different algorithms to combine the frames. I went for "Profile 1".
Luminance HDR offers even more algorithms to tone-map the image. And this is where it went wrong in the earlier attempts. Having tried all different options, I selected "Reinhard '02", pulled 'Key Value' to 0.01 (none of the other tone-mapping parameters have any effect at this stage). In order to darken the image, I use the 'Adjust Levels' histograms. And voilà, we got a presentable result created by free software.
2 frames pseudo HDR using Luminance HDR
There is still more noise in the image than in the image created by FDRTools. Again, this calls for the GIMP.
Here we go, same technique as described previously... and here is the result:
denoise / sharpen by the GIMP
Yep, the differences are getting really subtle now, which of course speaks for the use of free software!

I hope you enjoyed this little journey from commercial to gratis to free. Personally, I am not sure if gratis or free won the contest. But certainly commercial produced the least favorable result in this particular case. But than, using software of this nature is somewhat of an unfair abuse, isn't it?

Tuesday, January 28, 2014

Lunar Photography on the Cheap

Well, this is not the usual thing I would do. However, since those things are possible, I will show 'em to you... and also explain how I did it.

First of all, when doing astro-photography, I would usually use a decent telescope, e.g. an APO refractor w/ a fluorite-glass lens... or a decent reflector with some decent optics.

However, today, I show you how you can achieve an acceptable shot of the moon, using an inexpensive Canon P&S (point 'n shoot). I my case, it is my trusty IXUS 140 (ELPH 130). Of course, we need to use CHDK in order to shoot in RAW.

The shot was taken in the blue hour (aka. magic hour or golden hour). According to the exif data, the shot was taken at f/6.9, 1/125s, 40.0mm, ISO400 (date: 10.01.2014 @ 16:40).

Here is what the camera though I was aiming for (jpeg done by the camera, in the hope that blogger does not tweak the image too much):
JPEG as recorded by the camera, scaled and saved as PNG

The same shot, recorded in RAW (DNG) by CHDK, was taken into Photomatix and the GIMP with the following steps performed on the image.

Photomatix:
  • playing with single frame pseudo HDR parameters (tone mapping)
  • tweaking highlights and shadows
  • dropping exposure by some stops
  • increasing contrast
  • etc. 
Actually, for the fun of it, this is the image before I used the GIMP:
as exported from Photomatix, no noise-reduction yet
The GIMP:
  • duplicating the image, creating a second layer
  • creating a layer mask for the first layer (100% opacity)
  • masking out the moon (the first layer now contains clouds only!)
  • reducing the noise in the clouds using wavelet denoise
  • on the lower layer (luna!), increasing sharpness using wavelet sharpen
  • flatten the image
  • export to PNG
the result of the process laid out above

Yep, this is the same shot... compare the cloud pattern...
After some tweaks, the daylight shot looks like a night-time photo. Also, some detail (noise!) was added to the moon, while noise (detail) was removed from the clouds selectively.

Here you have it, it does not take pro-gear to create a cool(ish) shot of the moon. I happen to have access to Photomatix, however, I feel that you might be able to use some free software to obtain the same effect... maybe even the GIMP!

In comparison, on screen, you might like the image before GIMP better... however, I believe on a print, the GIMPed shot might have an edge.

Tweak your photos and enjoy!

Saturday, January 4, 2014

Legacy Series, General Thoughs on Imaging

General Thoughts on Imaging

CCDs are sensitive on visual, ultra-violet and infra-red wavelengths. Lets forget about UV by now! IR, quiet interesting, has a very different focal plane with refractive optics than visible light (it's all about the Snellius-stuff, e.g. chromatic aberration), thereby opening two possibilities:

  1. Block visual completely (a waste of light since IR is pretty well attenuated through our atmosphere)
  2. Use pure reflective optics (i.e. Newtonians).

I am still playing with the thought of the second option for the future. The problem here: The available telescopes of this kind having a reasonable size and a not too long focal length (about 70mm aperture and not more than about 500mm focal length) are usually of extremely cheap quality. To get some decent images the mount of the telescope (and it's tracking) has to be rather stable, usually then the telescope on a quality mount is again much bigger (i.e. focal lengths about 2m), making the field of view rather small, also the f-number ususally shifts to „darker“ (aka slower) values. All these things are supposed to be teleSCOPEs, optimised for visual applications usually.
Still one option to go for, a „cheap“ scope on a good mount. But remember, focal-reducers are no option here, these would include „chromatic“ aberrations again. Thus, a pure reflective telescope (i.e. Newtonian design) with absolutely no refractive element, the greatest possible aperture and the shortest possible focal length would be the intrument to go for, preferrably with a parabolic mirror (most of the cheapoes have spherical primary mirrors).

Presently I am using two basic setups for imaging, both including an IR-cut filter. The first setup is the relatively cheap, computerised refracting telescope ETX-70 by Meade, having an aperture of 70mm and a focal length of 350mm (making it f/5, a rather fast setup). The ETX-70, meant to be a beginners level scope, has quiet inaccurate tracking, thus exposure times are limited to about half a minute (still recording stars fainter than 14th magnitude!), field of view (FOV) is less than about 1°. The second setup consists of a webcam and a photographic objective (have a look the Bellow-Cam MK-II page for details). The setup is tracked by standart "cheap" hobby material, namely an EQ-2 mount (usually provided with very very simple telescopes) and the appropriate right ascension (RA) motor. Compared to the focal length (mostly 50mm) of the system this mount tracks well enough to expose for quiet some time. Drawback on this system: the camera fitting best mechnically (QC4000pro) is not as good as the one used together with the ETX-70. Advantage though: even faster optics, the 50mm lens, for example, is f/1.8, an IR-cut filter (not the best, better than nothing) present in the base of the CCD... Even faster lenses are available (e.g. on ebay) and, besides the webcam and the motor, everything in this setup was obtained via ebay for a real bargain total amount of money.
The alternative setup to the ETX-70 is a SK8035 (SkyWatcher 80mm 350mm f/4.4 achromatic refractor). The newest addition to the family is a SK15075 (SkyWatcher 150mm 750mm f/5 achromatic refractor), which performs really nice; more starry nights needed!

More on filters? Yes, there still is something to mention, I would recommend filters of all kinds cutting out Na- (Sodium) and Hg- (Quicksilver) lines. The visual impression might be disturbed, the photographic will be fine.


Legacy Series, Another Kind of HDR Photography

M42


Finally, some time and sky to work on long exposure webcam-astronomy... The remaining clouds allowed an open view on Orion. M42, certainly one of the more prominent objects, easy to see and easy to record, gives a perfect light source for experimenting as it includes a very bright open cluster as well as a dark cloud and a bright nebula.


Instrument
ETX-70 equatorial mode, #494 autostar
Camera
ToUCam pro PCVC-740, Baader IR filter
Data acquisition K3CCDTools, 10s exposures
Data registration
RegiStax 2, K3CCDTools
Frame stacking
RegiStax 2, K3CCDTools
Postprocessing
RegiStax 2 & IrfanView, iMerge

Some resulting images (based on the same recorded AVI file - have a look at a compressed WMV version) were obtained using different sets of postprocessing parameters (contrast, brightness, saturation, gamma curve, etc.) in order to respect the different aspects of the complex object. All image tuning steps were carried out on all pixels equally (no area selective tinkering).


The Results


Image resulting from registration and stacking, no postprocessing


The above "raw" image postprocessed using IrfanView


Light postprocessing using RegiStax


Massive fiddeling with RegiStax and IrfanView postprocessing


Registration using K3CCDtools linear scale


Registration using K3CCDtools logarithmic scale


All above combined using iMerge


The Observatory

Have a look at my hyper-professional setup to catch the hole in the clouds (greyish stuff above the roofs in the background). Even though the mechanical setup looks pretty solid, the RA motor of the fork produces some jitter occasionally. Consequently I performed a manual selection of the frames to be registered, resulting in a loss of about 30% of the 10sec frames.


Legacy Series, General Thoughs on Imaging

General Thoughts on Imaging

CCDs are sensitive on visual, ultra-violet and infra-red wavelengths. Lets forget about UV by now! IR, quiet interesting, has a very different focal plane with refractive optics than visible light (it's all about the Snellius-stuff, e.g. chromatic aberration), thereby opening two possibilities:

  1. Block visual completely (a waste of light since IR is pretty well attenuated through our atmosphere)
  2. Use pure reflective optics (i.e. Newtonians).

I am still playing with the thought of the second option for the future. The problem here: The available telescopes of this kind having a reasonable size and a not too long focal length (about 70mm aperture and not more than about 500mm focal length) are usually of extremely cheap quality. To get some decent images the mount of the telescope (and it's tracking) has to be rather stable, usually then the telescope on a quality mount is again much bigger (i.e. focal lengths about 2m), making the field of view rather small, also the f-number ususally shifts to „darker“ (aka slower) values. All these things are supposed to be teleSCOPEs, optimised for visual applications usually.
Still one option to go for, a „cheap“ scope on a good mount. But remember, focal-reducers are no option here, these would include „chromatic“ aberrations again. Thus, a pure reflective telescope (i.e. Newtonian design) with absolutely no refractive element, the greatest possible aperture and the shortest possible focal length would be the intrument to go for, preferrably with a parabolic mirror (most of the cheapoes have spherical primary mirrors).

Presently I am using two basic setups for imaging, both including an IR-cut filter. The first setup is the relatively cheap, computerised refracting telescope ETX-70 by Meade, having an aperture of 70mm and a focal length of 350mm (making it f/5, a rather fast setup). The ETX-70, meant to be a beginners level scope, has quiet inaccurate tracking, thus exposure times are limited to about half a minute (still recording stars fainter than 14th magnitude!), field of view (FOV) is less than about 1°. The second setup consists of a webcam and a photographic objective (have a look the Bellow-Cam MK-II page for details). The setup is tracked by standart "cheap" hobby material, namely an EQ-2 mount (usually provided with very very simple telescopes) and the appropriate right ascension (RA) motor. Compared to the focal length (mostly 50mm) of the system this mount tracks well enough to expose for quiet some time. Drawback on this system: the camera fitting best mechnically (QC4000pro) is not as good as the one used together with the ETX-70. Advantage though: even faster optics, the 50mm lens, for example, is f/1.8, an IR-cut filter (not the best, better than nothing) present in the base of the CCD... Even faster lenses are available (e.g. on ebay) and, besides the webcam and the motor, everything in this setup was obtained via ebay for a real bargain total amount of money.
The alternative setup to the ETX-70 is a SK8035 (SkyWatcher 80mm 350mm f/4.4 achromatic refractor). The newest addition to the family is a SK15075 (SkyWatcher 150mm 750mm f/5 achromatic refractor), which performs really nice; more starry nights needed!

More on filters? Yes, there still is something to mention, I would recommend filters of all kinds cutting out Na- (Sodium) and Hg- (Quicksilver) lines. The visual impression might be disturbed, the photographic will be fine.


Legacy Series, how to analyse long exposure AZ data


Analysing Data Recorded with Azimuthal Setups

It is quite obvious that an azimuthal mount causes field rotation, when not used on the North- or the South-pole. For real long exposures (i.e. minutes to hours) this is utterly devastating for every image taken.
Here the abilities and power of CCDs are coming into play. With exposure times of a couple of seconds, field rotation does not play any role for the single frame. As long as the CCD amplifier ensures that the charge in a single pixel is high enough to result in a signal greater than the detection threshold we can integrate over several different frames. Now field rotation will return when not properly taken care of .

IRIS however is capable to compensate for rotation between individual frames during alignment. Lets see what is to be done, on a step by step basis, assuming the raw fits series (after conversion) is called r#.fits (for red), g#.fits (for green) and b#.fits (for blue). Furthermore assume that the data set contains 50 frames.
  • Get a “Display commands window” first.
  • If not using IRIS in the first place you most likely have to convert your AVI-file into a plurality of FITS-files. When going for color, every frame will be present in a red, a green and a blue channel in separate FITS-files. That means, that you will have to perform all following steps on a respective color files individually. Conversion done by: [click: File -> AVI conversion... ].
  • Now you will have to select two suitable objects (stars) by marking.
    For this you have to get one frame into the main window, preferably the first of a series: [type: load r1].
    Now mark two medium-bright stars which are not too close to each other: [click: Analysis -> Select Objects => with the funny mouse pointer click on two medium-bright stars].
  • If everything went fine so far, you will be ready for registering the frames yet: [type: rregister r rr 100 50].
    A new file-set with the name rr will be created. Forget about the third parameter for the moment, you will learn to use it with some practice.
    With the time it will become clearer which registration objects will give better results and what combination will not be so good.
  • Stacking registered frames, nothing easier than this: [type: add2 rr 50].
  • Now you certainly would like to save the result: [type: save red].
  • Do the same with the other two colors...
  • To combine the three images you could do all sorts of tricks with IRIS. A simple first glance could be: [type: trichro red green blue].
    Save your result by: [type: savebmp myimage].
Have a look at an example analysis done on M52 data. Both results came from the same data set, analysed in different ways.


M52, ETX-70, analysed with K3CCDTools, dark frame subtracted
M52, ETX-70, analysed as described above, no dark frame subtraction


Legacy Series, long-exposure ToUCam PCVC-740K

ToUCam PCVC-740K long-exposure modification


Background Story

Please have a look at the superb pages available all over the globe. Many thanks to Steve Chambers for sharing his findings with the internet-community! Please have a look at Steve's page to understand that it will not be allowed to use the information provided for purposes of profit.
Three pages to be mentioned as being a very good source for rock solid informations:
(1)   http://www.pmdo.com/wintro.htm
(2)   http://members.bellatlantic.net/~vze29wzh/toucam740mod.htm
(3)   http://www.aludobson.de/CCD/umbau_einer_toucam_pro.htm


Please note that whatever you do to your camera is up to you. What I disclose on my pages is based on personal experience. Other setups (OS, software, soldering skills) might lead to other results, don't blame it on me.

Schematics

This is just a tiny little part of it. For convenience I decided to used different NAND gates than shown in (2). Reason being that the ugly style / dead bug / Manhattan method appeared to be the appropriate design choice to me for an incomplex circuit like this one. In dead bug it is easiest to bend pins together... pin 1 and pin 2, pin 3 and pin 12. Half the work done w/o any effort.


Warning

If this is your first SMD-sized project, please do not start directly... do some practice before. A webcam certainly is ruined very very quickly!


Photographs...


Overview of the battle-field side of the toucam's PCB, cuts already being applied


Practice cut.... get rid of additional light produced by the green SMD-LED


These cuts are essential (see link (2) mentioned above), cutting too much of the mass-plane does not harm, but... watch out for the other leads! I used a sphere type diamond-tool to mill away the leads to be disconnected.


Wires do not need to go around the PCB in any case. Here are two vias which can be used to solder [Pad8] to pin 1 of the 4011 (lower wire) and [Pad10] to the potential switch (upper wire). I used 0.2mm "magnet wire" (enameled copper wire)...
In these places, the wires are soldered to the PCB-vias. BTW: finally I did not add a switch to the cam... what for anyway?


The leads (0.2mm magnet wire) connecting "Pin8" to pin 11 (4011) and [Pin10] to the 100k resistor. Both wires use "foreign" vias to channel to the side of the PCB (as long as the enamel varnish is not scratched at the tunneling portion of the wire, no problem can be encountered).


Both sides of the story.... the blue wire is the power supply for the 4011. (Sure, I could have searched for another place to get 5V from.... but, time is money, isn't it?).


And... on the other side of life....  Dead bug "mounted" (cyan-acrylate) 4011 with 100k resistor. In the upper quarter of this image the connection between [Pad8] and pins 1 and 2 of the 4011 is visible. The lower quarter show the "tunneled" leads to pin 11 (4011) and to the 100k resistor.


Dead bug 4011.... the two blue wires are the link to the parallel port connector.


Switch?

You will need the switch only if you intend to take still-image with the camera in the common way. For video the camera will still be working fine with [Pin10] of the 16510 being connected to the 100k resistor.
Personally I omitted the switch...


Have a look at an observation using the camera recording the Great Orion Nebula (M42) in combination with an ETX-70.


Legacy Series, the Bellow Cam Mk 2 SC GT


Bellow-Cam Mk 2 GT

 Being used to GOTO-telescopes, I also liked my wide-angle camera to be equipped with this feature. OK, it is not a big deal at all to handle right ascension and declination setting circles, pointing the scope/camera by α and δ looked up from catalog or star chart data, but, goto is sooo convenient! After some looking around, I got myself a used MEADE DS-127 mount with an AutoStar #957 computer. Perfect!
Fitting Bellow-Cam Mk 2 to the mount is so simple that I would not like to waist words on this issue. It took a piece of hardwood, two bolts and two nuts to get it all sorted.

Bellow-Cam Mk 2 GT, the wide-angle camera setup on the “autostared” DS-mount, in operation.

Analysis

It is quiet obvious that this is an azimuthal mount, resulting in field rotation. For real long exposures (i.e. minutes to hours) this is utterly devastating for every image taken.
Here the abilities and power of CCDs are coming into play. With exposure times of a couple of seconds, field rotation does not play any role for the single frame. As long as the CCD amplifier ensures that the charge in a single pixel is high enough to result in a signal greater than the detection threshold we can integrate over several different frames. IRIS offers a very good possibility to register and stack frames which are slightly rotated between one another.
A very very short introduction how an analysis like this could be looking like can be found here.

Result

The image of M45 was taken 2005 January 9th. Again I was to lazy to subtract a dark frame. Note the image tilt, that's the sacrifice for compensating field-rotation when using an azimuthal mount. To be noted on the image is amplifier-glow on the upper left corner. The QuickCam appears not to be the best camera, even with the use of non-raw patch, ear-like artifacts still occur.
It is amazing, I think, that the nebulosity of M45 can be recorded using a f=50mm SLR lens and a webcam from a light polluted place like South Holland, on a night with light overcast and quiet poor transparency...

Lagecy Series, the Bellow Cam Mk 2 SC


QC4000pro LX (SC2)

The QuickCam 4000 pro had to go through a long exposure  modification following the "SC2" approach as described by Martin Burri. There is nothing much beyond Martin's remarks to be mentioned. The modification went pretty straightforward. No pins are to be lifted in this way of modifying, cutting PCB traces does the deal. I soldered magnet wire (I have tons of this around for my radio projects) to the pins of the ICs. The individual leads are connected to a kind of "patch panel", the tiny bit of bread-board PCB glued to the camera opposite the USB and microphone connector. Blue wires are making the final connection to the 4011 hidden below the whole mess. The red and the yellow wire (stereo phono cable) are serving as connection to the parallel port of a computer.
BTW, in contrary to the ToUCam, this camera holds an infrared cut filter inside the objective lens bearing, thus no additional IR-filter is needed in a setup like shown here.


Camera front-side, no lens mounted.
For reasons of experimentation, the camera is built in tilted...


Additionally I spent money and obtained a
Ra-motor for the EQ2. Decent tracking is
a necessity for the long exposure times the
camera was modified for.


LX-astro images

You are invited to compare with the images recorded using Bellow-Cam MK1 and Bellow-Cam MK2. Messier 44  gives some impression about the benefits of longer exposures. Exposure time was chosen to be 10s/frame. Conditions on March 13th 2004 when I was acquiring data for the following image were fair (for this site), with the unarmed eye, I could see Orion's sword.


M44, 50mm f/1.8

Legacy series, the Bellow-Cam Mk 2

Bellow-Cam Mk 2

Another Camera

The Vesta fits quiet OK, but not really well.... Philips, for what ever reason, appears do design funky shapes for webcams... Logitech obviously shows some more heart for tinkerers, doing so they designed a ball, long ago, and sticked to that design. Certainly a ball fits better into the bellow-cam... Have another look... you might recognize a QC-4000pro in un-modified state.
The webcam is held by self-adhesive window frame insulation rubber, the circular openings of the bellow are perfect to fit the QuickCam-ball in....
In this stage I have chosen to mount the camera on an EQ2 mount. The Ra and Dec axis allow easy aiming when the coordinates of the object of interest are known, furthermore the mount enables manual tracking.


side view with 50mm lens
resulting field of view about 4°

side view, 135mm lens with "dew cap"
resulting field of view about 1°30'

front view with 50mm lens

back view

front mount detail, no lens

rear mount detail

the "victim"

the "supporter"


M45 (Pleiades)  recorded with the above setup

Legacy series, the Bellow-Cam

Relatively old stuff from my original web-page... 
 

The Bellow-Cam

A Simple Wide-Angle Camera

Guess what, I am lazy.... So, I tried to find as much "completed work" as possible. Resulting in a rather simple design. All parts can be easily found on fleamarkets or rallies... The basis of all are a photographic bellow, a Vesta pro and a couple of lenses (M42). Cardboard finished the first design, but just have a look...


Vesta-Cam using a 50mm f/1.8 lens (no long-exposure!)


M44 (Praesepe) recorded with the above setup, unguided camera on a simple tripod,
the bright spot on the lower left edge is Jupiter